Remote Proxy Setup
Remote Proxy Setup
If you require access to
- workflow.iitm.ac.in, academic.iitm.ac.in or other internal websites OR
- journals available through IITM subscription
- other restricted websites available only through IITM network and do not otherwise need access to licenses or servers inside IIT Madras, please use the following proxy setup instead of VPN.
Instructions are given here for Firefox only - for Chrome or Internet Explorer/Edge, you will need to see how to set up the proxy options. Also, the instructions here are only for desktop, so please give feedback if you know how to make it work for mobile browsers.
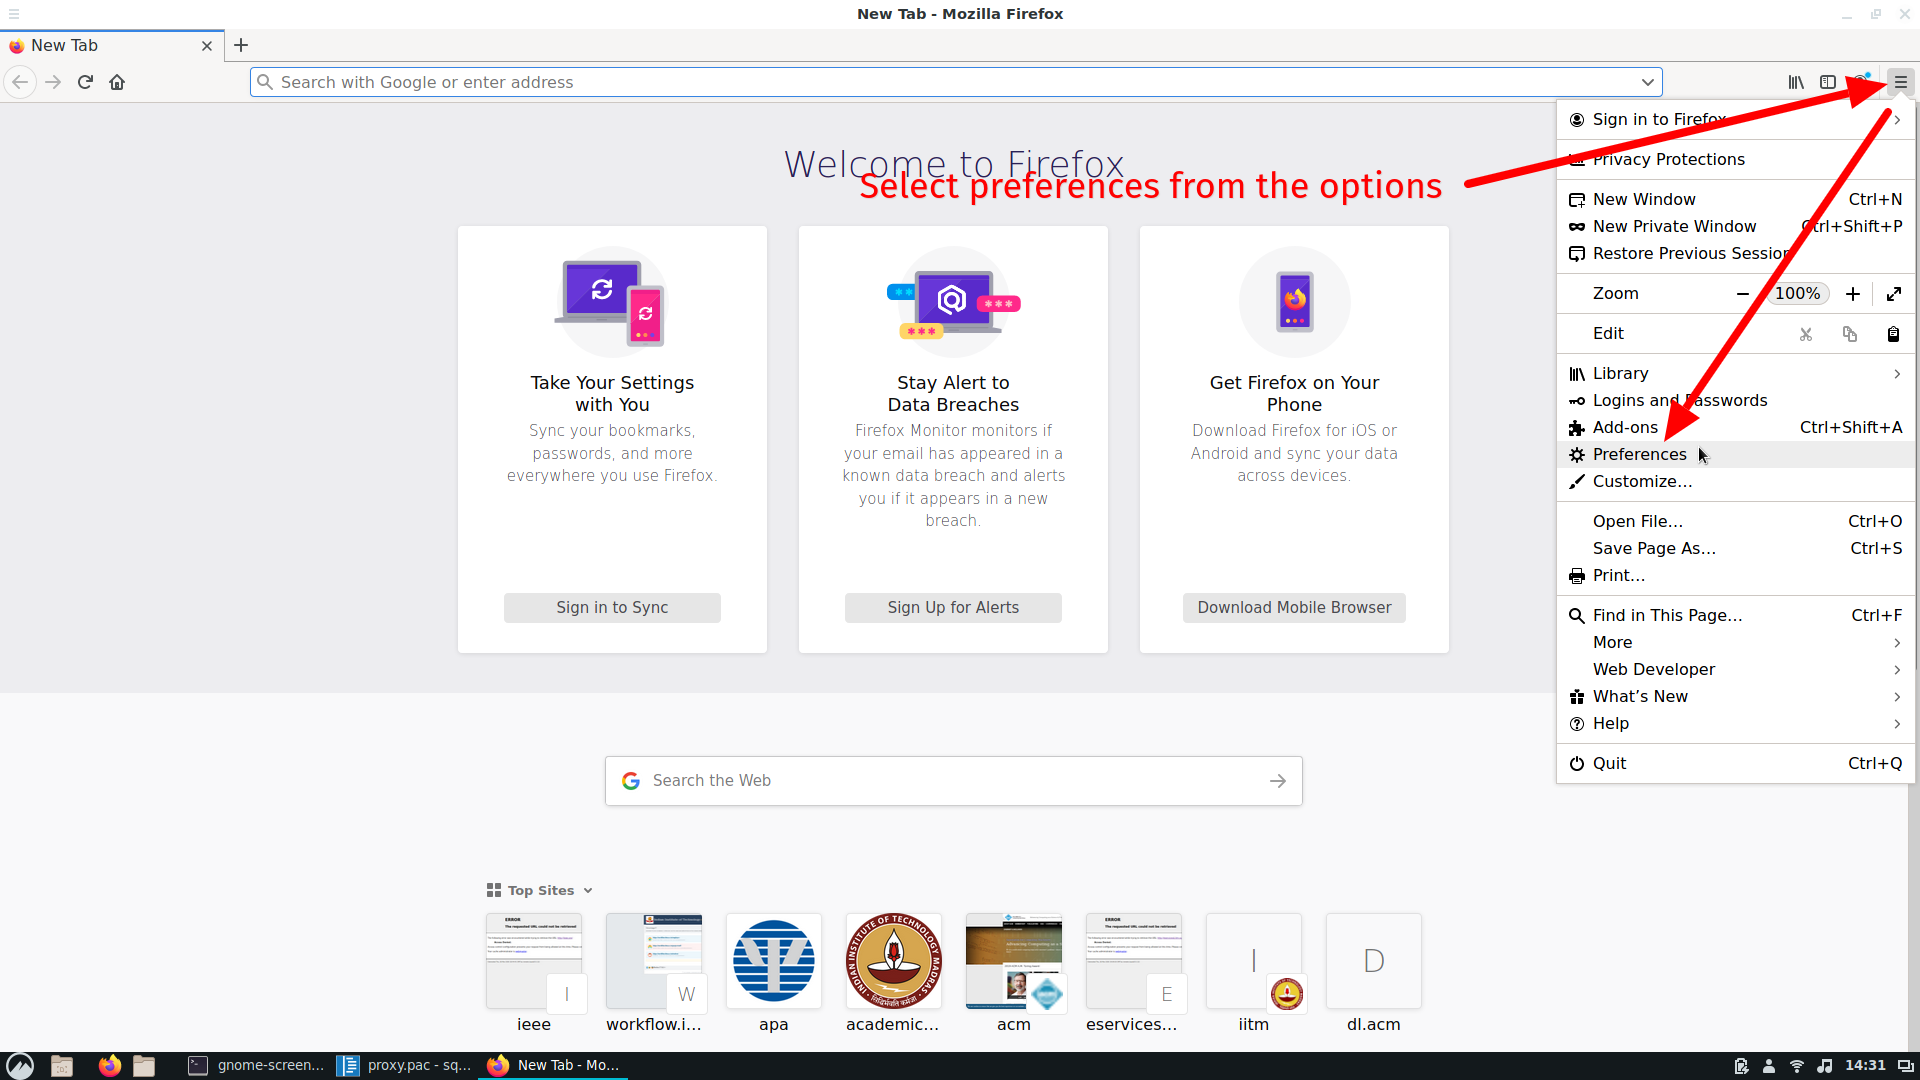
Step 1 Open the “Preferences” page in Firefox
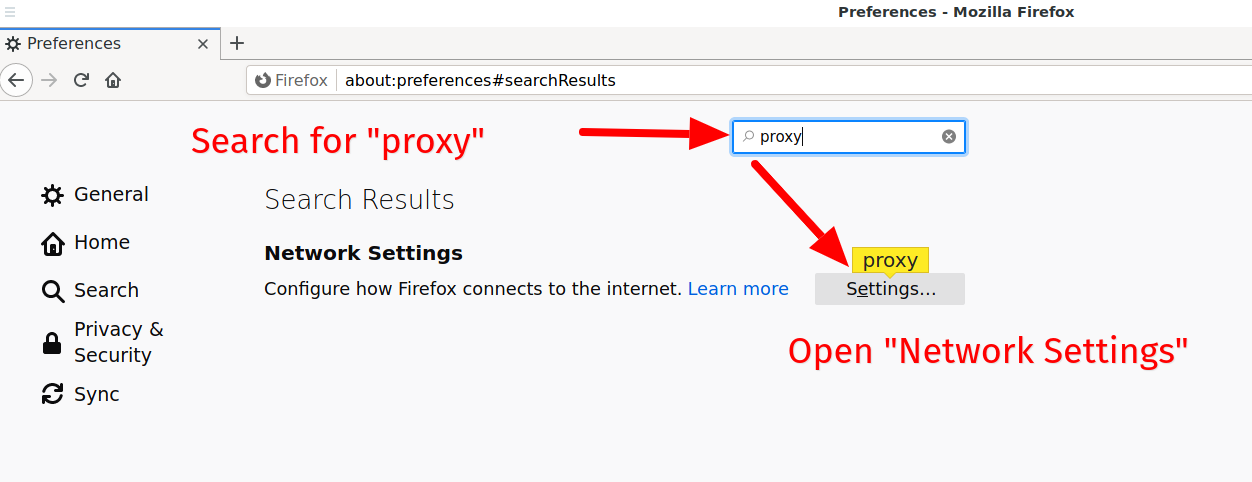
Step 2 Open the “Network Settings” page under the Preferences, (search for “proxy” should do it)
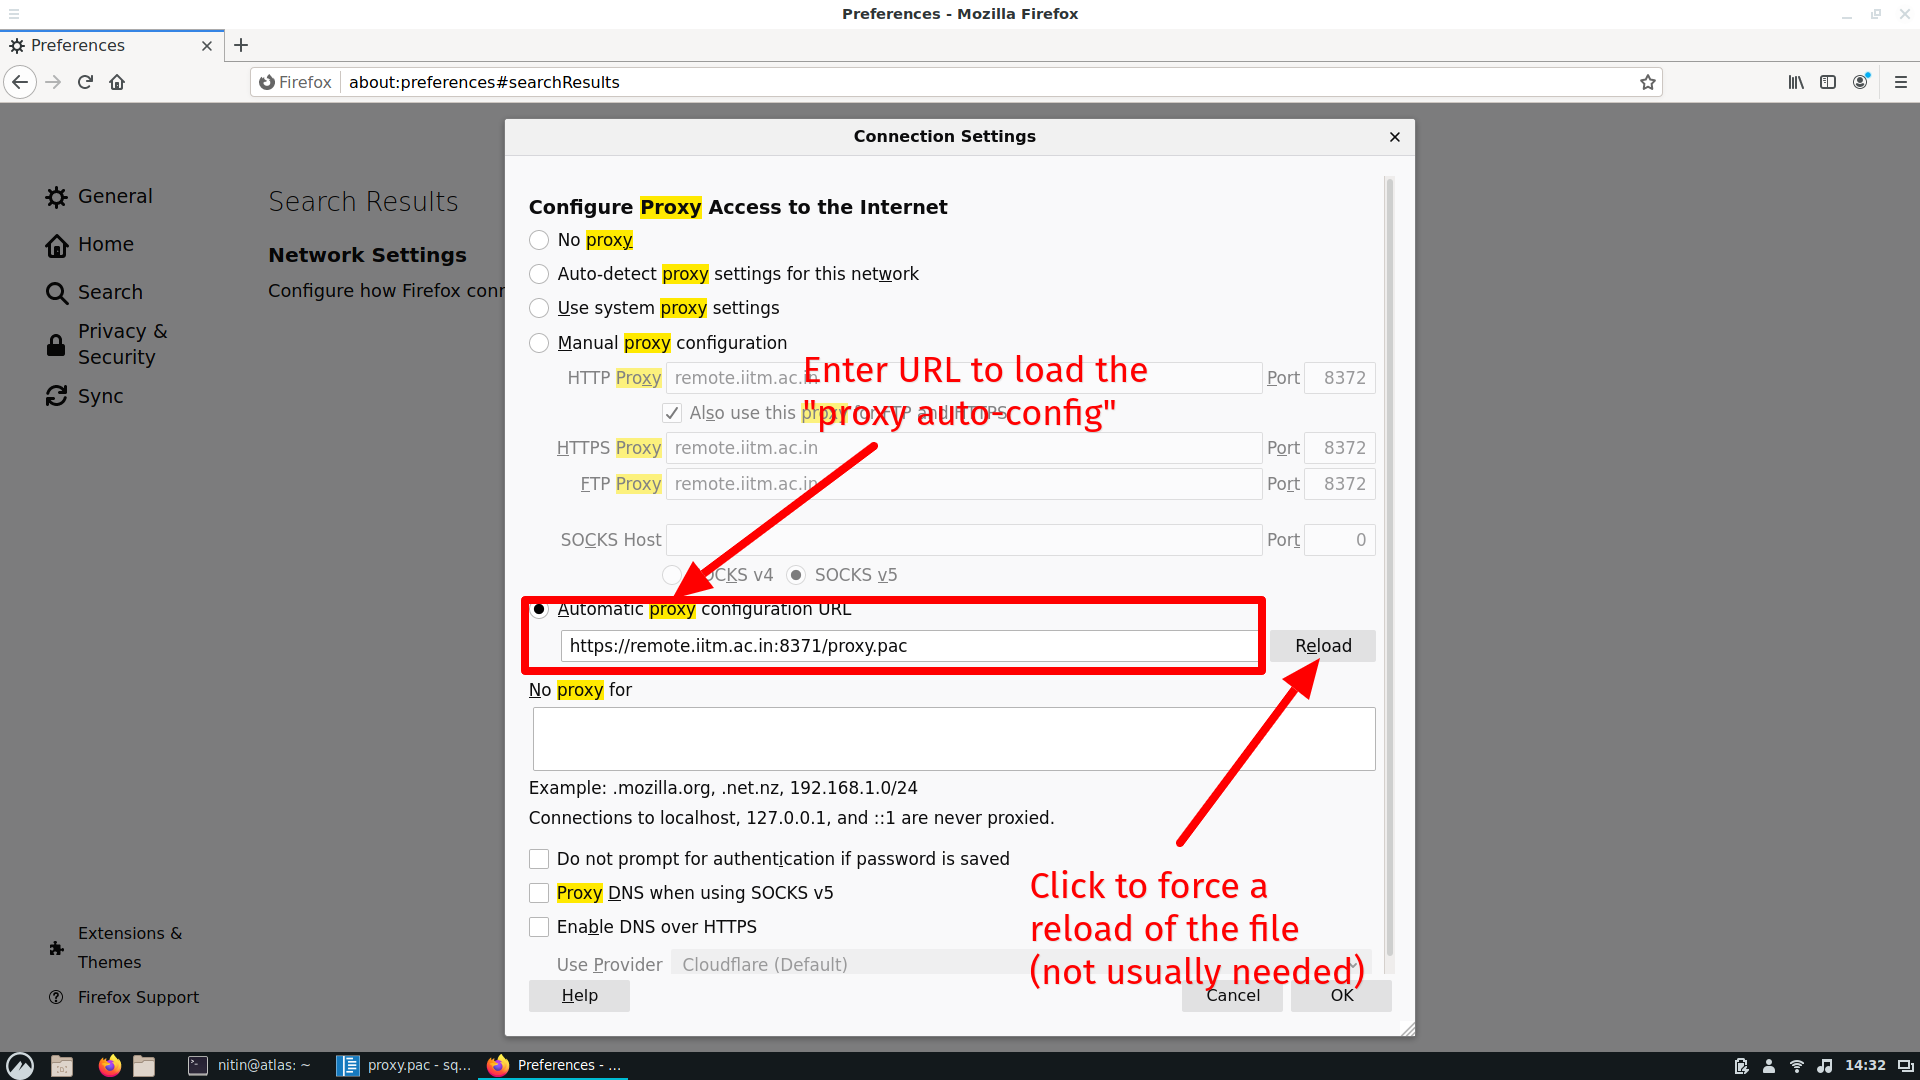
Step 3 Set the Proxy Auto-Config URL to the following value and reload if necessary
https://remote.iitm.ac.in:8371/proxy.pac
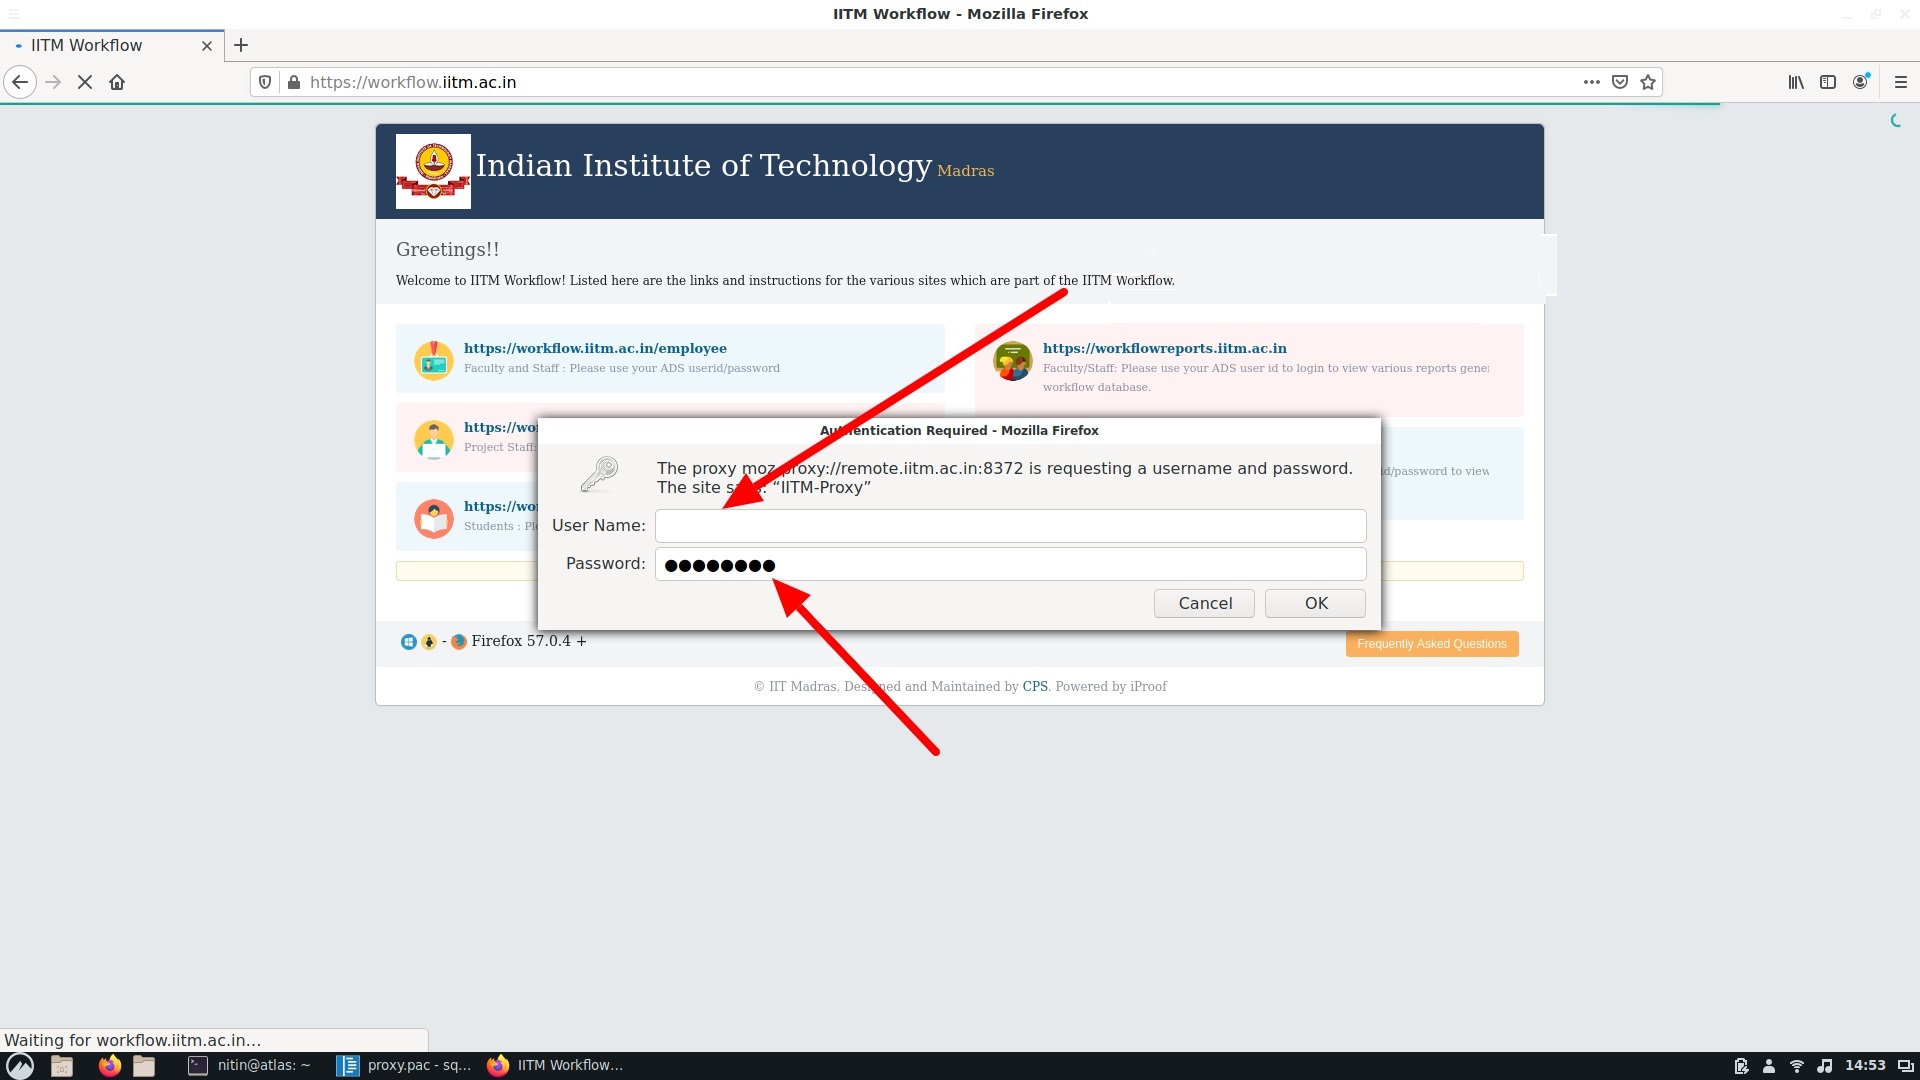
Step 4 Log in
Effect Once the above steps are done, you should find that only traffic destined for workflow, academic, journals etc goes through the proxy, and everything else goes through your regular network. If you are still not able to access journals etc., send a screenshot of error message (if possible) to netadmin@iitm.ac.in.
Instructions for setting up Remote Proxy on Android phones
-
On your mobile device tap Settings -> WiFi
-
Long tap on connected network’s name.
-
Give Password to connect Wifi
-
Modify Network Config -> Show Advanced Options.
-
Check Proxy and change from None to Auto
-
PAC URL: Type the remote proxy address as given below
https://remote.iitm.ac.in:8371/proxy.pac
-
CONNECT
-
Once the Wifi connected
-
Go to Chrome browser, type on the address bar workflow.iitm.ac.in or Journal domains.
Click the link to play the video for configuration
https://cc.iitm.ac.in/sites/default/files/remote/remote-android.mp4
