IITM-VPN
IIT Madras provides VPN access to its network via Fortigate SSL VPN. In order to enable VPN, student/faculty/staff should make a request to Computer Center. VPN can be accessed through FortiClient by using LDAP username and password. Instruction for VPN connection
For students: Send request through Faculty advisor to netadmin@iitm.ac.in
For supporting staff: Send request through “The Registrar, IIT Madras” to netadmin@iitm.ac.in
You will get a confirmation from netadmin@iitm.ac.in
Installation
Windows, MacOS, iOS & Android
Download and install Forticlient from [FortiNet Website](https://www.fortinet.com/products/endpoint-security/forticlient)
- Direct download links:
    -[Windows 10 and Windows Phone 10](https://apps.microsoft.com/detail/9wzdncrdh6mc?hl=en-ca&gl=CA)
    -[MacOS (v10.8 Mountain Lion or higher)](https://www.fortinet.com/products/endpoint-security/forticlient)
    -[iOS (9.0.0 or higher)](https://apps.apple.com/md/app/forticlient-6-0/id525600370)
    -[Android (4.1 Jelly Bean or higher)](https://play.google.com/store/apps/details?id=com.fortinet.forticlient_vpn)
Ubuntu & Debian
Download and extract FortiClient for Linux from [here](https://www.fortinet.com/products/endpoint-security/forticlient)
CentOS, Fedora & Other Linux
Download and extract FortiClient for Linux from [here](https://www.fortinet.com/products/endpoint-security/forticlient)
Usage
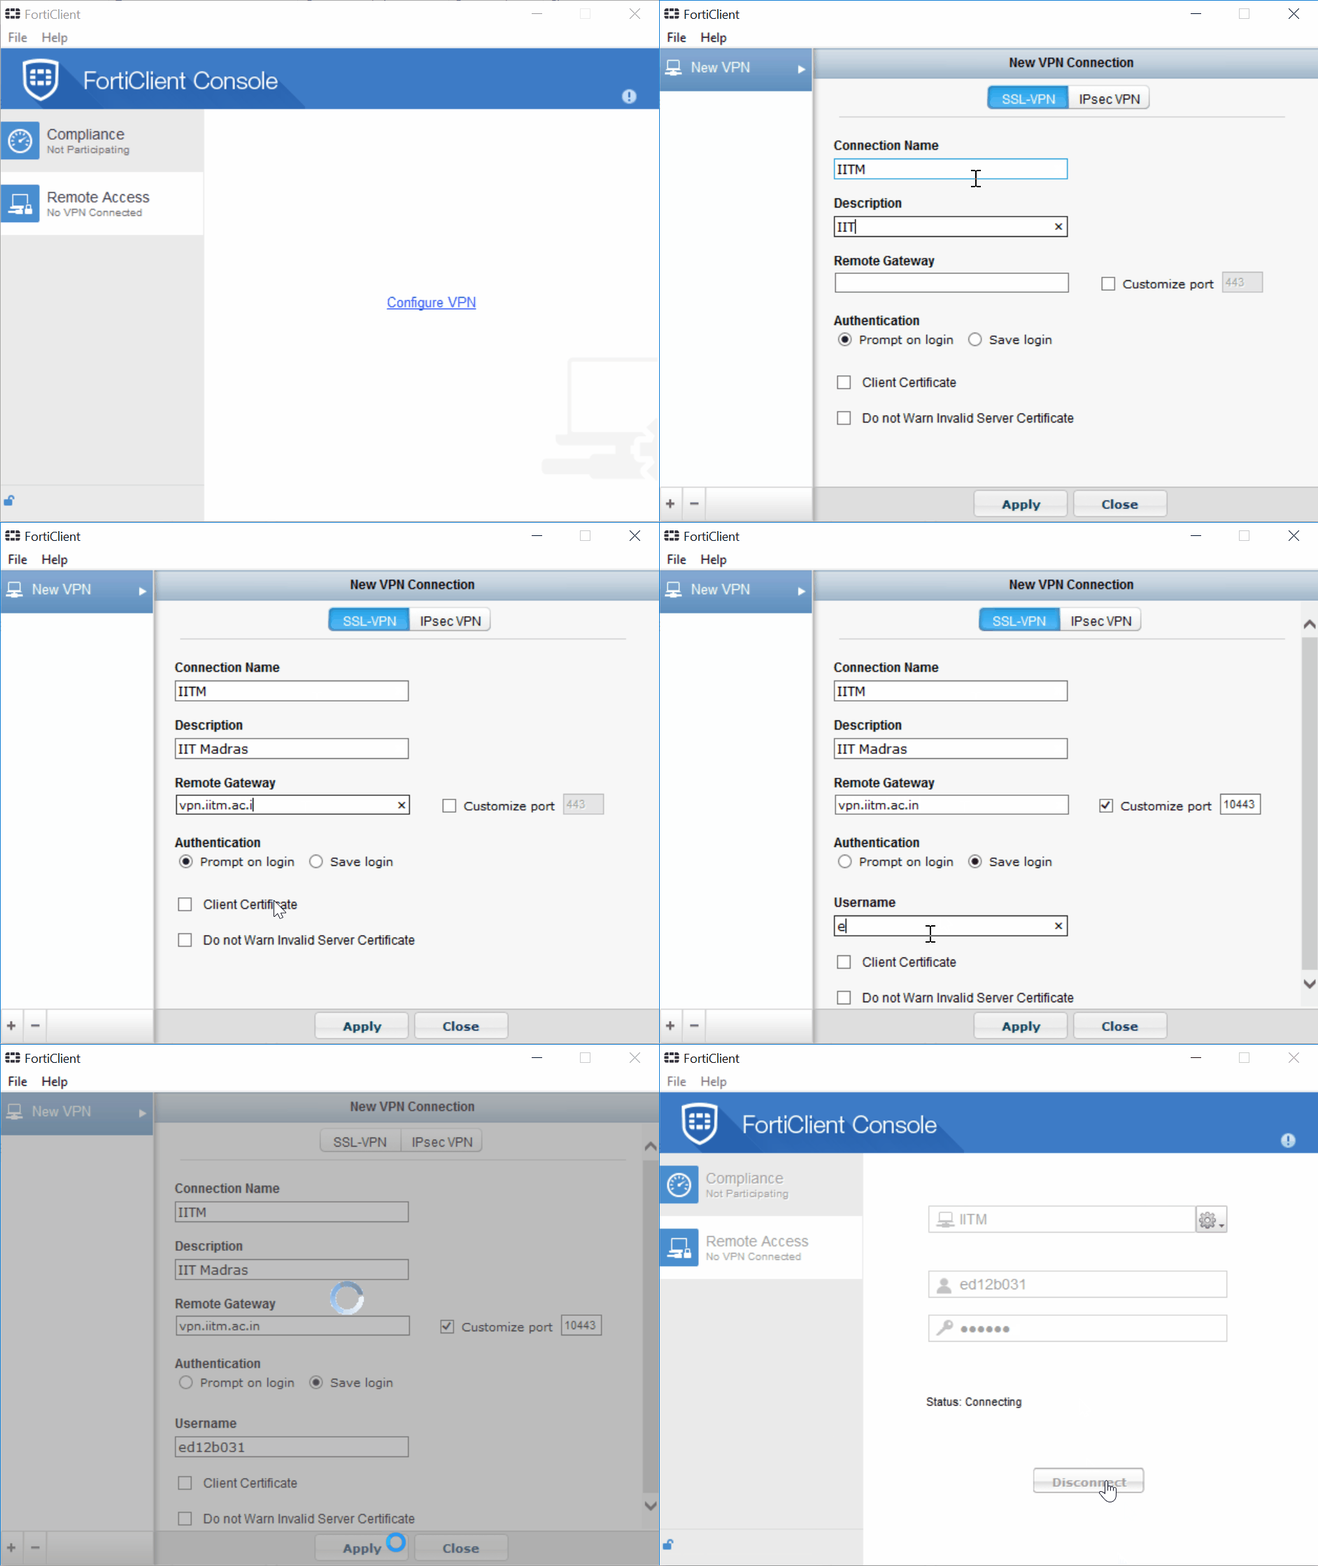
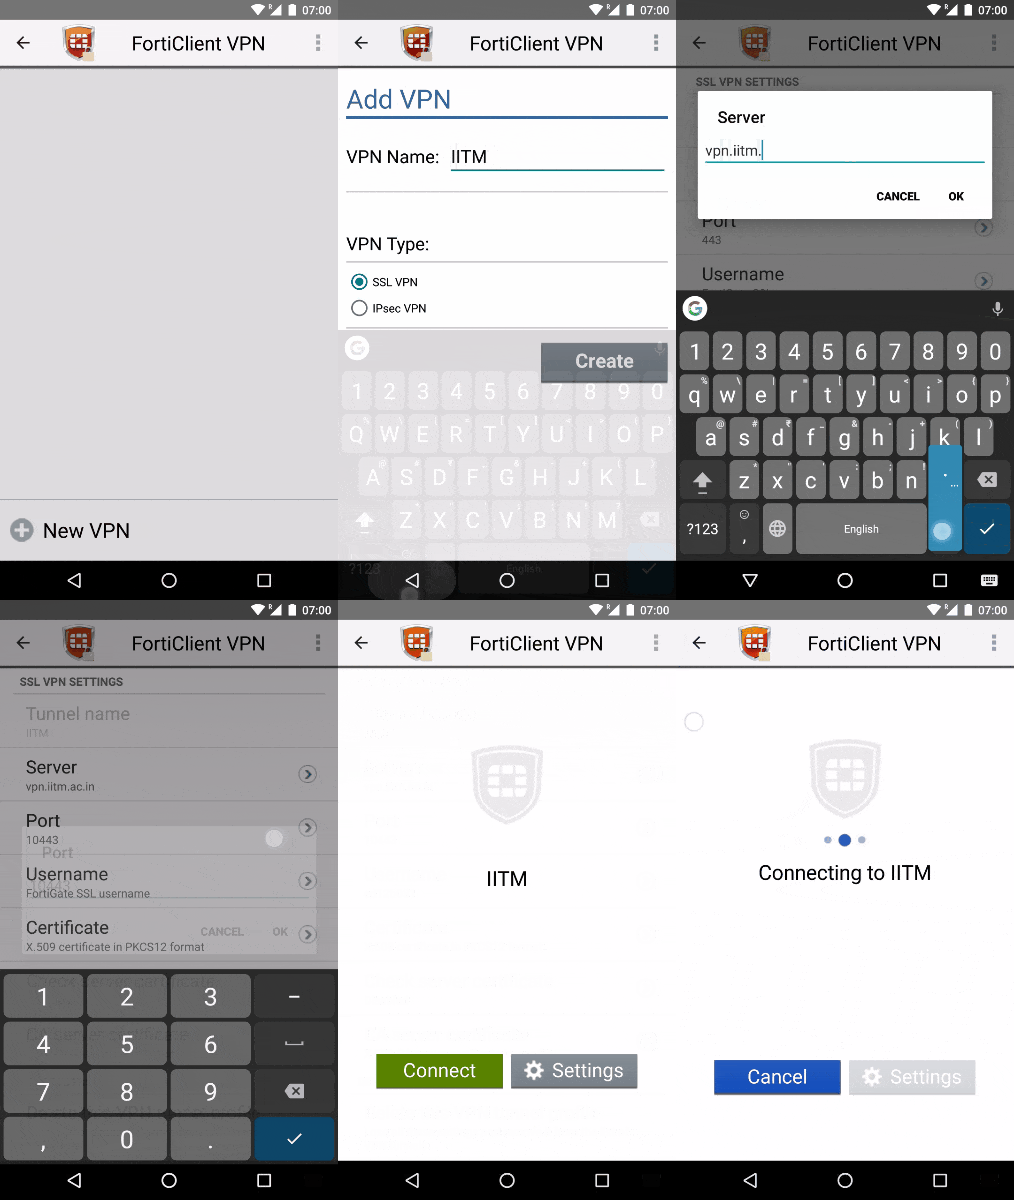
Windows, MacOS, iOS & Android
- Launch FortiClient
- Create a new VPN profile with following parameters:

    - Name: IITM
    - Type: SSL VPN
    - Server: vpn.iitm.ac.in
    - Port: 10443
    - Username: <your-ldap-username>
    - Password: <your-ldap-password>

- Save the profile and connect
- You can now use any browser to get IITM interNal websites
Windows

Android

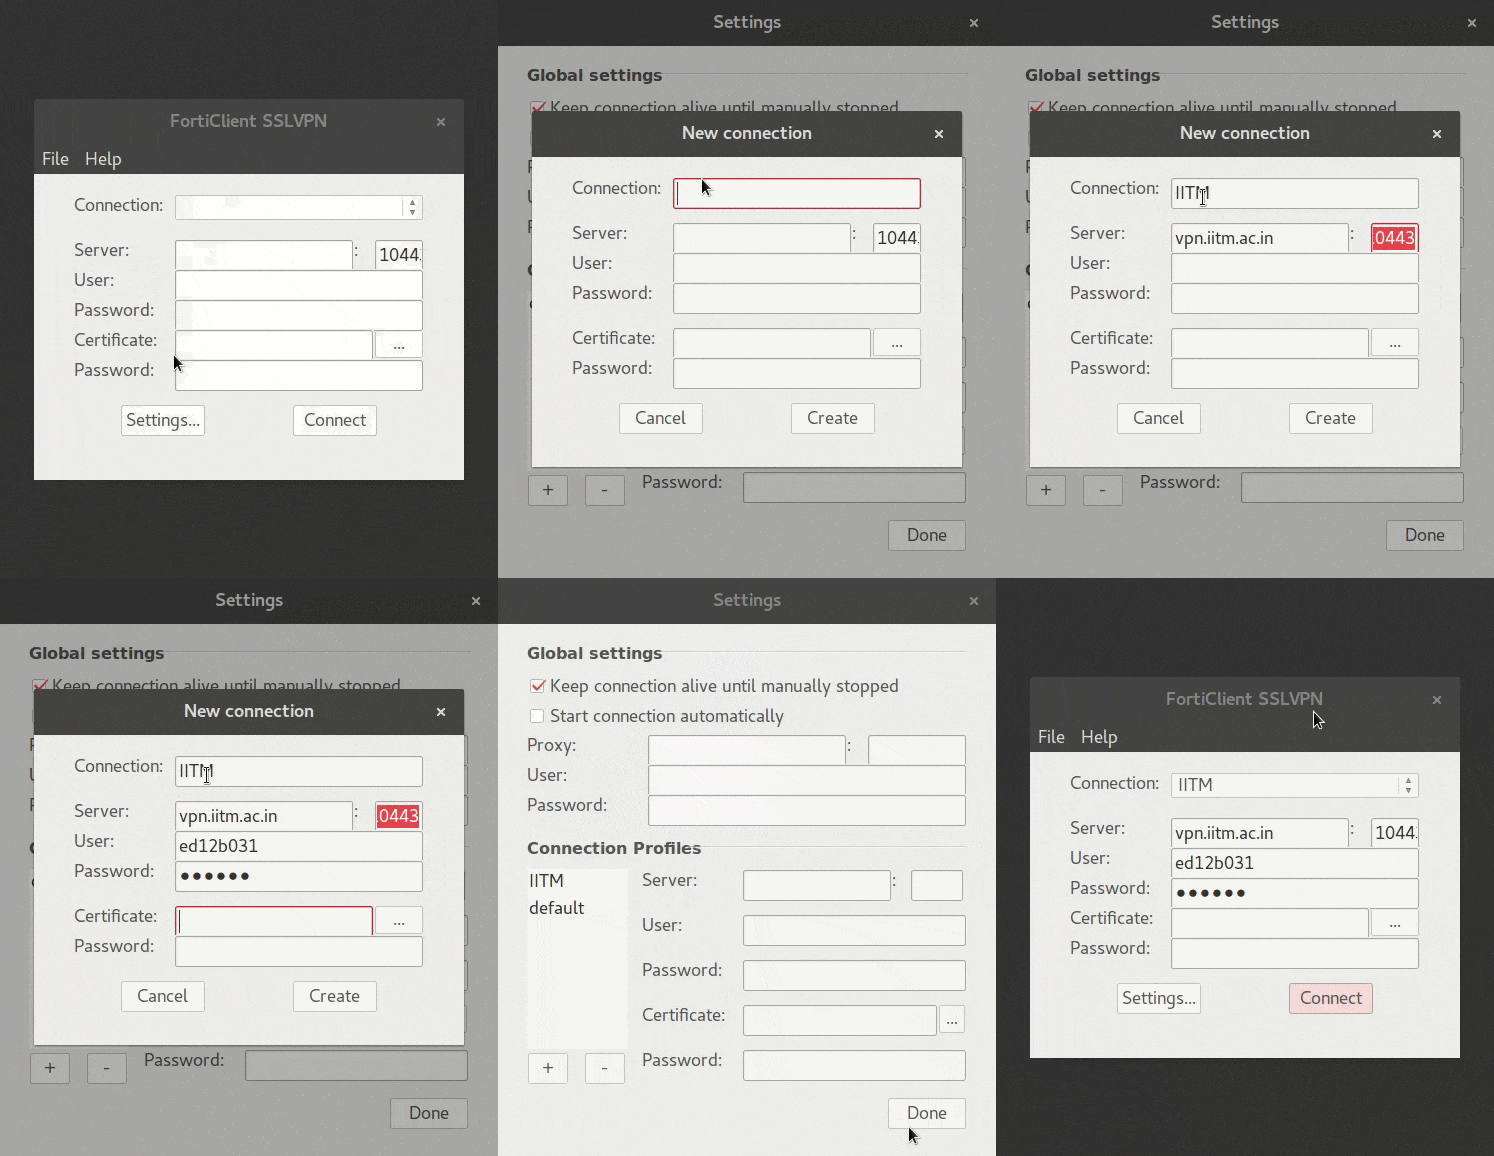
Linux
- FortiClient
   - Launch forticlientsslvpn from 32-bit or 64-bit folder
   - Enter administrator password when prompted
   - Accept license when prompted
   - Click on Settings
   - Click on + button under Connection Profiles
   - Enter the following details:

      - Connection: IITM
      - Server: vpn.iitm.ac.in
      - Port: 10443
      - User: <your-ldap-username>
      - Password: <your-ldap-password>

  - Click Create -> Done
  - Select IITM from Connection
  - Click Connect
